Wednesday, December 19, 2012

Andes Peppermint Crunch Shortbread Cookies and Peppermint Snowball Cookies

Andes Peppermint Crunch Shortbread Cookies

Andes Peppermint Crunch Shortbread Cookies

Things have sure been crazy and busy around here!  Christmas is less than a week away.  Seems like we’ve had all kinds of activities going on and I can barely sit down, let alone share blog posts with you all.  I decided to sit down and try to get a post written up today before our next activity tonight. 

I didn’t take this picture, but how cute is this little elf who must be hiding something in his shirt?!


IMG_1853

Not long after Thanksgiving, which was really early this year, the boys were begging me to get all the Christmas decorations up.   Finally got that done just in time for Kevin’s department Christmas party at our house, hosting about 20 people.

We’ve had the pleasure of attending a high school band concert, since Scott plays the drums in the concert band.  Look how sharp he looks in a tux!  This kid never lets me take his picture, but I think even he was liking how he looked! ;)  The concert was great, but we were a little disappointed that all the drummers were in the back row and a tuba player and his tuba were right in front of Scott.  sigh

12-12-12 From one thing to another over the last month, I was able to get all the neighbor Christmas treats made and delivered, too.  After sharing with you such good ideas with the 12 Weeks of Christmas Treats, I decided I can’t leave out a few more that must be shared.
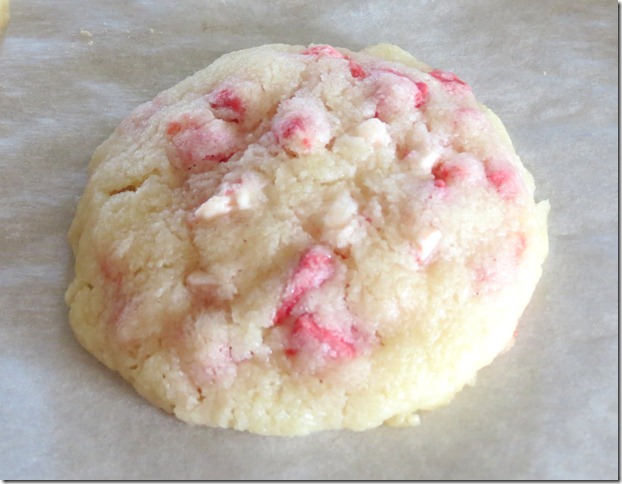
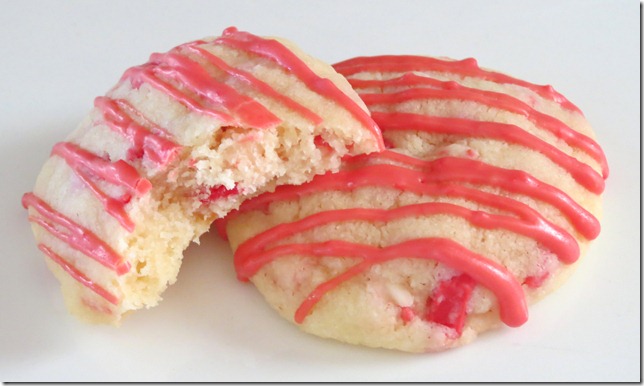
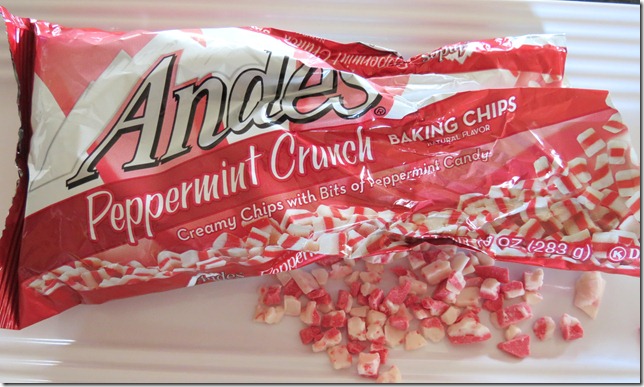
Andes Peppermint Bits Shortbread CookiesThese Peppermint Crunch Shortbread Cookies are one of those not to miss, especially if you love peppermint.  Have you found these in your grocery store baking aisle?

Andes Peppermint Crunch Baking Bits

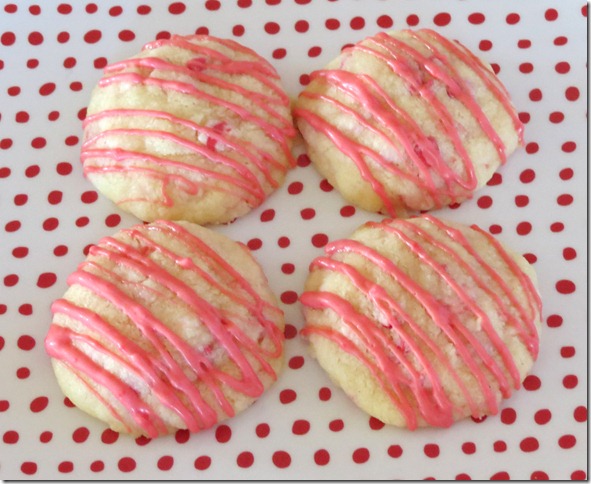
Andes Peppermint Bits Shortbread Cookies

I actually made them for my book group weeks ago and have been wanting to share them since then.  I just took a shortbread cookie recipe, like the Mexican wedding cookies, and instead of adding the chopped pecans, I added the peppermint candy.  I then drizzled some of the melted candy over the tops.

Andes Peppermint Crunch Shortbread Cookies, by Katrina, Baking and Boys!

½ cup unsalted butter, softened

¼ cup granulated sugar

½ teaspoon vanilla extract

1 cup all purpose flour

1/8 teaspoon salt

½ c to 1 cup Andes Peppermint Bits (to taste), use some to melt and drizzle on the cookies

Cream together the butter and sugar until well combined. Add the vanilla and mix. Beat in the flour and salt just until the dry ingredients are mixed in. Stir in the Andes mints.

Roll dough in to walnut-sized balls and place on baking sheet lined with parchment paper spacing the balls of dough about 2 inches apart. Bake at 350 degrees for 12-15 minutes. Let cool a few minutes on the baking sheet before removing them to a wire rack to cool completely.

Melt some of the peppermint candies in the microwave in a small glass bowl in 20-30 second intervals on half power. When melted, put the melted candy in a sandwich-sized zip top plastic bag and snip a small hole in one corner. Drizzle the melted candy over the cookies.

We finally had a nice, big snow last week, about six inches.  After shoveling the deck and part of the driveway, I wanted to make a snowman.  The boys had already played outside sledding and didn’t really want to help, so this is what I came up with almost with no other help from the others. 

Baker Snow-Gal 12-15-12Yep, she was a baker snow gal!  Made her eyes and mouth from chocolate disks and she wore the cute knitted chef’s hat my niece made me that has chocolate chip cookies on it.  Instead of going in search of some sticks for her arms, I used some kitchen utensils.  I don’t have any aprons, which would have really been cute, but I wrapped a blanket around her and tried to make it look like an apron.  I thought she turned out pretty cute! ;)

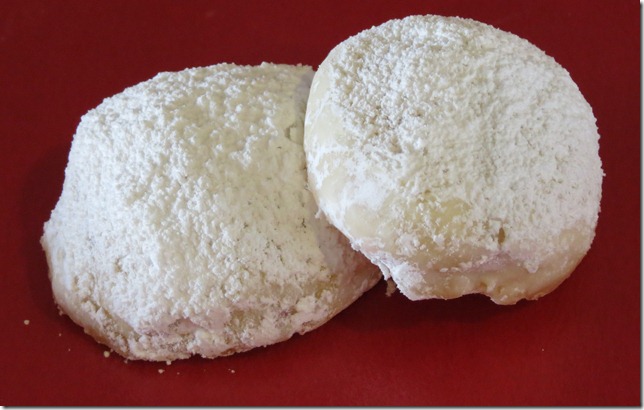
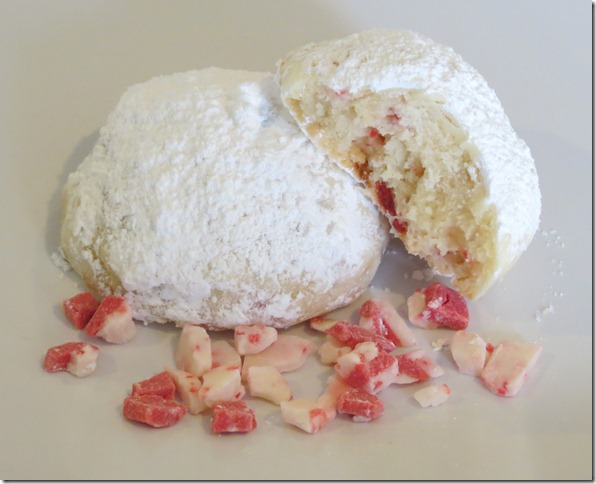
After making the Andes peppermint shortbread cookies, I thought I’d try another recipe, but with the same idea.  Instead of drizzling melted chocolate, I rolled the baked cookies in powdered sugar. 

Peppermint Snowballs

I like this recipe a little better, but preferred the stronger peppermint taste the first cookies had with the drizzled melted candy.  That could easily be fixed by added more of the candy to the cookies or evey a little peppermint extract to the dough.  They are both good!

Peppermint Snowball Cookies 3

Perfect Christmas cookies!

Peppermint Snowball Cookies

Peppermint Snowball Cookies, by Katrina, Baking and Boys!

1 cup unsalted butter, softened

½ cup powdered sugar

1 teaspoon vanilla extract

2 ¼ cups all purpose flour

¼ teaspoon salt

1 ½ cups Andes Peppermint Bits (These are the same cookies where you could substitute pecans for the candy)

Powdered sugar for rolling the cookies in

Preheat oven to 350 degrees F. Line baking sheets with parchment paper. Cream together the butter and powdered sugar. Add vanilla. Beat until well mixed. Beat in the flour and salt just until combined. Stir in the Andes. Roll dough in to walnut-sized balls and place on baking sheet about 1 inch apart. Bake for 10-12 minutes. Let cool on baking sheet for a couple minutes then remove to wire rack to cool completely. Roll each cookie in powdered sugar.

BAKE ON!

The boys’ last day of school was today.  Time to really get the holidays going!

Thursday, December 13, 2012

Peppermint Angel Food Cake Roll—12 Weeks of Christmas Treats

Peppermint Angel Food Cake Roll

Peppermint Angel Food Cake Roll

This is it, Friends—Week 12 of the 12 Weeks of Christmas Treats.  I chose to share with you this great cake I’ve made twice this week for different Christmas activities.  It was a hit both times.  Wish I could take credit for this, but I can’t at all and didn’t even really change the recipe for the one in the December issues of Taste of Home magazine.  You need to go get the recipe that was submitted by Suellen Calhoun. 

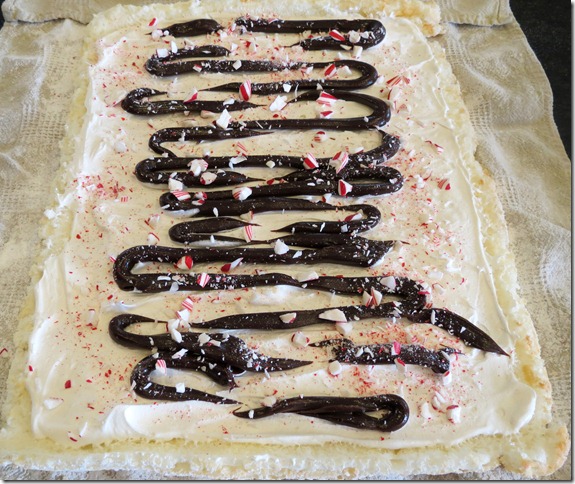
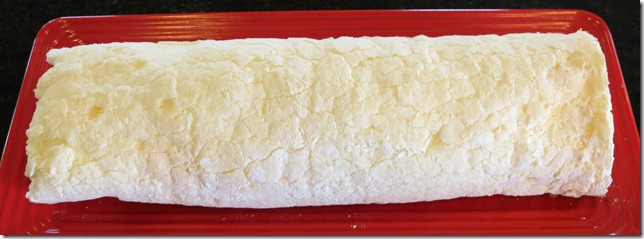
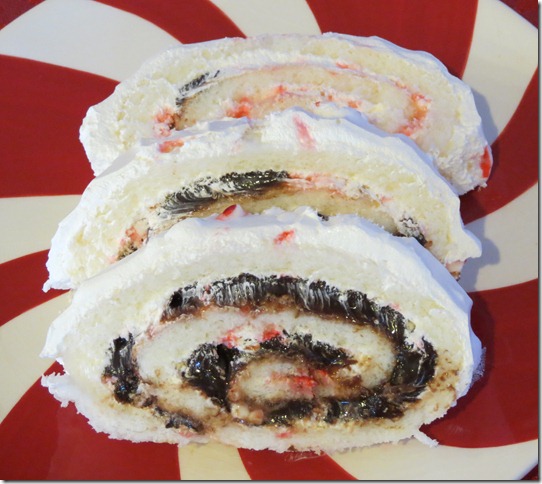
It was certainly easy to make.  The cake is made with a boxed angel food cake mix and spread into a large baking pan that is lined with parchment paper.  After the cake is baked and just barely cooled, you remove it from the pan, remove the parchment paper and roll up the cake to cool completely.  Once the cake has cooled, it is unrolled and spread with whipped topping, then drizzled with hot fudge sauce and sprinkled with crushed peppermint candy.

Peppermint Angel Food Cake Roll ready to roll

Ready to roll!

Peppermint Angel Food Cake Roll 2

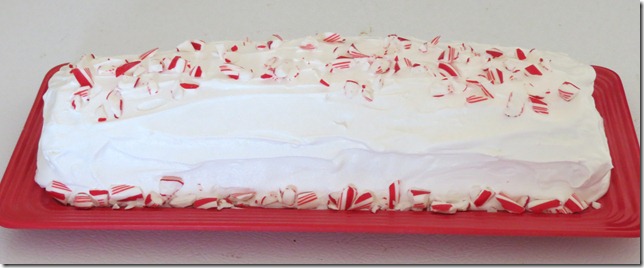
At this point, I put the cake in the refrigerator and didn’t cover it with more whipped topping until just before serving it (you could use real whipped cream, too—I followed the recipe and went for easy).  The whipped topping also has peppermint extract added to it. 

This is a perfectly minty, holiday treat!

Peppermint Angel Food Cake Roll 3

The pictures of the sliced cake doesn’t  look that great (to me), because I snapped a few pictures of some that were leftover the next day after the first party.  There were so many desserts to choose from that the whole thing wasn’t eaten that night.  The peppermint would look better photographed when it is first served. ;)  When I made the cake just yesterday for another occasion, it was all gone from the dessert table before I even got my dinner.  It was a much bigger group.

Please go find this cake at Taste of Home.  I love the magazine and the website is great.  The Lime Shortbread with Dried Cherries I posted last week are from the same issue of the magazine.  If you aren’t subscribed to Taste of Home, you should be—or at least join their free membership online.

This is it—I said that already, huh?  I have a number of other recipes (ones I actually came up with myself) that I want to get posted before the holidays.  That’s my goal.  Time really is crazy this time of year.  We’ll see what I can do.  In the meantime, Happy Baking and Happy Holidays to everyone!

image

Thanks for allowing me to be a part of the 12 Weeks of Christmas Treats go to our host, Brenda at Meal Planning Magic.  So many wonderful treats from everyone!

Thursday, December 06, 2012

Lime Shortbread with Dried Cherries—12 Weeks of Christmas Treats

Lime Shortbread with dried cherries 12-5-12

Anyone else NOW starting to feel  in total shock that Christmas is so close?  I’ve been known to stress out a bit as I work to get all the things done I’d like during the holidays, which usually involves lots of baking, but decided this year, I’m just not going to worry.  It is what it is, whatever will be, will be.  That said, there is lots to do! ;)  Like make more cookies!  So here’s to week 11 of the 12 Weeks of Christmas Treats—Lime Shortbread with Dried Cherries.

I found this recipe in the December issue of Taste of Home.  It was submitted by Abigail Bostwick of Tomahawk, Wisconsin.  She said the recipe can also be made with orange zest and dried cranberries.  I’m sure they would be good, but I love the lime and cherries combo.

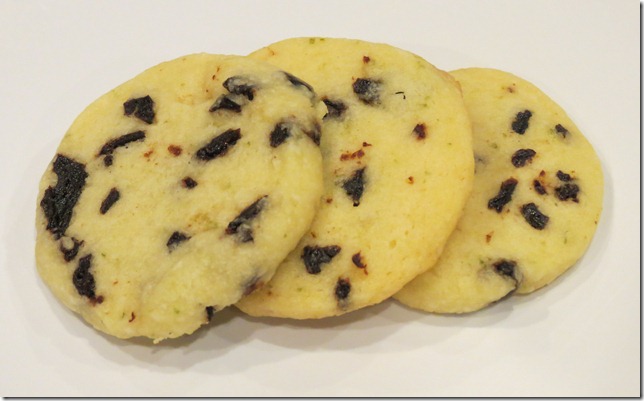
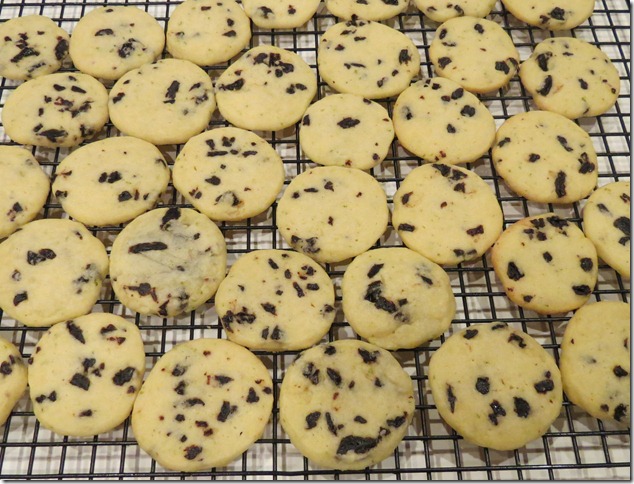
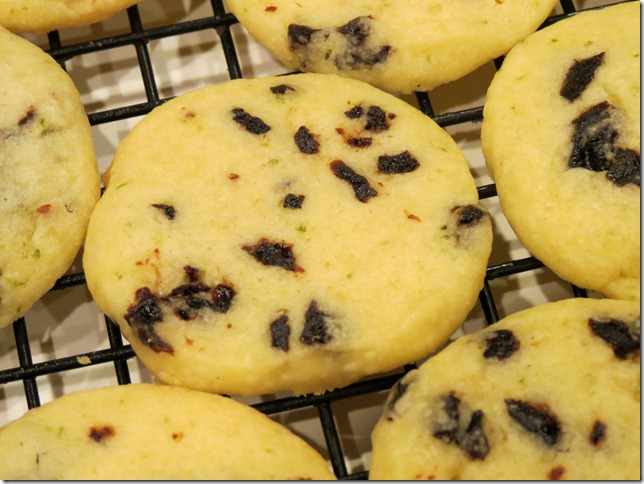
These are a simple shortbread with lime zest added and chopped dried cherries.  After making the dough, it is formed in to two logs and chilled for a few hours.  These slice and bake cookies are great.  If you like shortbread and especially lime, you’ll really like these.  The tart dried cherries I used are a lot darker than the ones used in the magazine photo, so the red would look better on a Christmas tray, but it doesn’t really matter—they’re just as good, I’m sure.

Though it’s kind of funny, Kevin walked in the room after I’d finished baking them and saw this---

Lime Shrotbread

“What’s up with the Dalmatian cookies?” ;)

I’m torn about leaving the recipe here.  I didn’t change a thing so I’ll just have you go to the Taste of Home link above, which just takes you to the website home page.  You need to sign up (free) to get their recipes.  I’ve always enjoyed Taste of Home magazine because the recipes are all submitted from home bakers just like all of us and I don’t recall being disappointed.

12Lime Shortbread with dried cherries

Only one more week of the 12 Weeks of Christmas Treats blog hop, hosted by Brenda from Meal Planning Magic.

Tuesday, December 04, 2012

Spicy Gingerbread Twigs

Spicy Gingerbread Twigs 12-4-12

Today was Tuesdays With Dorie.  I’m a flake.  Sort of.  I made the Gingerbread Baby Cakes, but did not like them, so I decided not to post them.  The recipe (for me) has WAY too much molasses.  So all I could taste was molasses and not the spices.  Mine turned out a little too fudgy (maybe not baked long enough) and the centers sunk, which always annoys me with cakes.  I only made half the recipe and it still had one cup of molasses in it.  I knew it would be too much for my liking, but made it anyway.  I’m not bitter or angry.  I actually recently saw the episode on Baking With Julia on my PBS station where these were made.  After baking the cakes and smelling that great gingerbread smell, I was wanting something with ginger. 

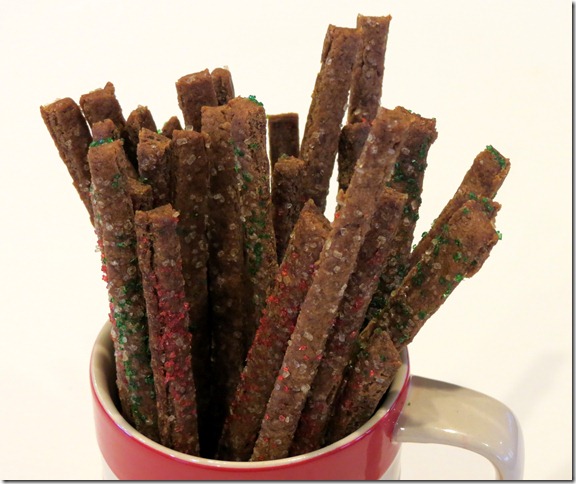
Just happened to be reading the current issue of Better Homes and Gardens and saw these Spicy Gingerbread Twigs and they intrigued me enough that I made them today.  I love biscotti and have made gingerbread biscotti before, so I knew a crunchy cookie with gingerbread flavor would be good, well, that and who doesn’t like gingersnaps (besides my husband)? ;)  It was simple to follow the recipe and I only changed one thing—since we don’t drink or use coffee and this recipe had a quarter cup of brewed coffee in it, I got a quarter cup of warm water and added one tablespoon of cocoa powder to it.  Nothing like substituting chocolate for coffee!

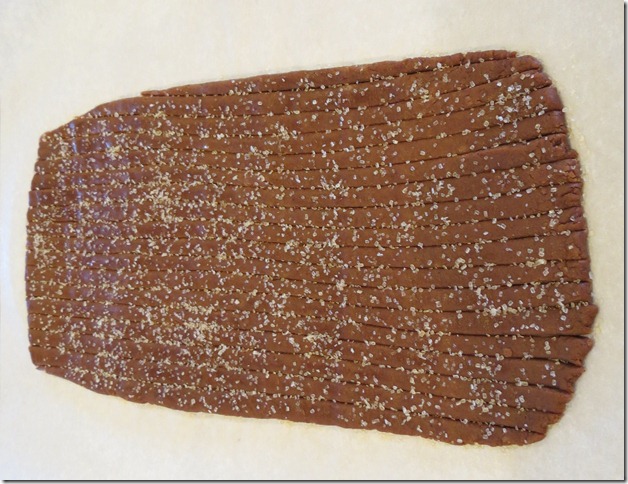
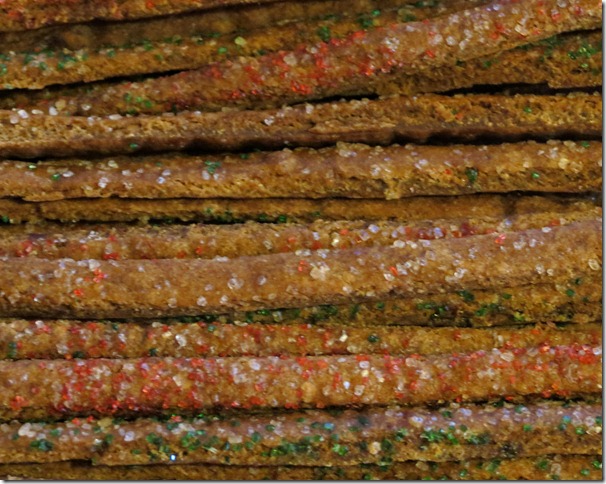
After making the dough, which was really easy to make with melted butter, molasses and my “coffee” combined together and adding it to the dry ingredients, it was ready to divide in half and roll in to the suggested 6 x 12 inches.  “Twigs” were then cut with a pizza cutter and it was baked.  Much like biscotti, after the first baking, the temperature of the oven is turned down, the cookie twigs were spaced apart and then baked again.  Before baking, the dough was sprinkled with coarse sugar.

Spicy Gingerbread Twigs 4

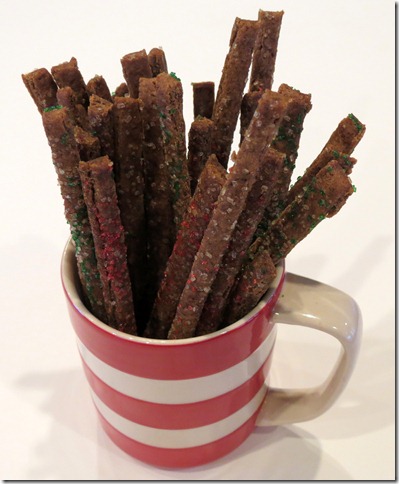
I hadn’t yet made the cut down the middle for this photo so they weren’t so long, but they are about six inches long.  The magazine recipe suggests cutting them in the short direction, but it comes out the same when it is then cut down the middle.

Spicy Gingerbread Twigs 12-4-12

Get the recipe on the link above, since I didn’t change much, I’m not going to re-type it.  Oh, the recipe also had some optional cayenne pepper, which I decided to leave out so I could really taste the ginger and because I’m a wimp. ;)

Spicy Gingerbread Twigs

Kevin’s UVU department Christmas party is at our house Friday night.  While the meal is being catered by Honeybaked Ham, I am making some desserts and think these twigs will be fun to have set out along with some other things.

Sorry about the TWD mishap, I know many loved the cakes and have seen a few that look better than mine did.  I also wonder with my sinking-in-the-center issue if it has to do with the high altitude and I should have adjusted the recipe a little. 

If you’re looking for a great gingerbread cake, try this one, from my friend, Paige at For Love of the Table.  I think I’ll make that one—soon—maybe for the Christmas party on Friday.  It has chocolate—I love chocolate and ginger. 

Thursday, November 29, 2012

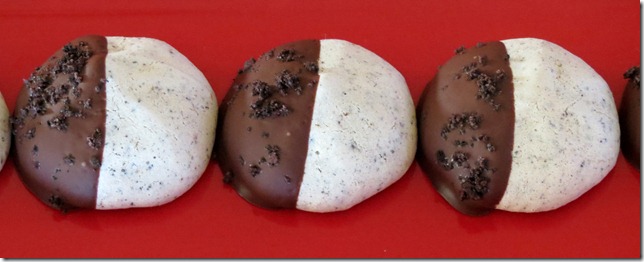
Candy Cane Oreo Meringue Cookie—12 Weeks of Christmas Cookies

Candy Cane Oreo Meringues

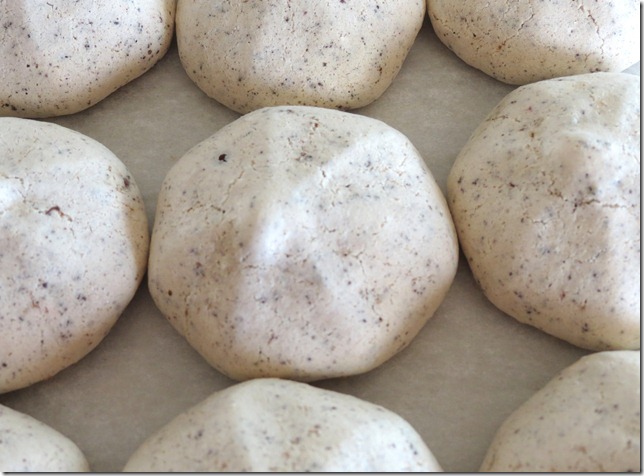
We’re in the home stretch, Friends.  Today is Week 10 of the 12 Weeks of Christmas Cookies!  After Thanksgiving, I ended up with eleven egg whites to use for something.  I almost made an angel food cake, but ended up doing other things with the whites.  Someday I’m going to make an angel food cake since I never have made one from scratch and bought a pan a few months back to do so.  But I ended up doing one thing or another with a couple of the egg whites and then decided to make meringue cookies with some.  These Candy Cane Oreo Meringue Cookies turned out great!

Candy Cane Oreos

After finding and loving the new, limited edition Candy Cane Oreos, I decided it would be fun to crush some up and put them in the meringue cookies.  They turned out great!

Candy Cane Oreo Meringues 11-27-12

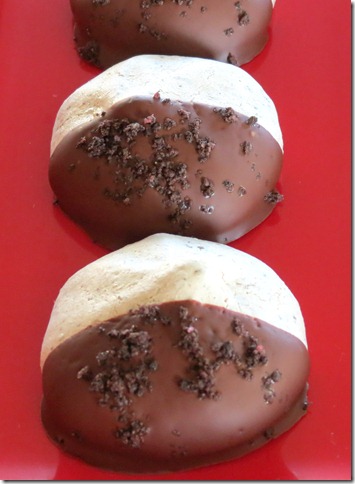
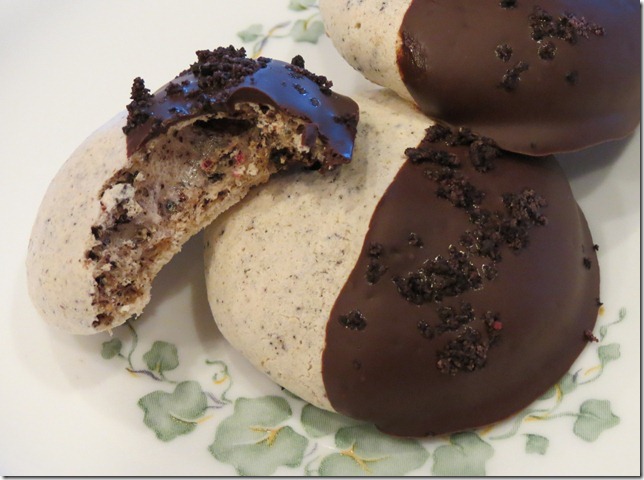
While they tasted fine as is, I dressed them up a little with a dip in some melted chocolate and a little more sprinkling of the crushed cookies.

Candy Cane Oreo Meringues

I love meringue cookies.  The boys do, too.  And these were a hit at book group I made them for the other night.

Candy Cane Oreo Meringue Cookies 4

Light and crispy, airy but flavorful, love these!  They are so easy to make and pretty low fat.  Win, win!

Candy Cane Oreo Meringue Cookies, by Katrina, Baking and Boys!

2 large egg whites (66 grams), room temperature

1/2 cup granulated sugar (100 grams)

1/2 teaspoon vanilla extract

4 tablespoons crushed or ground Candy Cane Oreo Cookies, and extra for sprinkling on the tops (about 5 cookies)

4 ounces dark chocolate (good dark chips or chopped chocolate)

1 teaspoon coconut oil (or butter/shortening)

Preheat oven to 300 degrees.  Line baking sheet with parchment paper.  Beat egg whites on high in an electric mixer fitted with a wire whisk attachment.  As they are beginning to whip, add the granulated sugar a little at a time.  Add the vanilla extract.  Beat until stiff peaks form.  Remove bowl from mixer and fold in the ground Oreo cookies.  Put the mixture in a large piping bag fitted with a large tip (I use a star tip, but round works just fine).  Pipe dough in to about 1  1/2 inch mounds spaced an inch apart.  Bake for 30 minutes.  Let cool.

Melt chocolate in a microwave safe bowl in 20-30 second intervals with the microwave a half power.  (Should only take a couple minutes, stirring in between intervals.)  Dip half of each cookie into chocolate and set on parchment to harden.  Sprinkle with the ground cookies.  Let sit at room temperature until chocolate has hardened.  Makes about 20 cookies.

The 12 Weeks of Christmas Treats is brought to you by Brenda from Meal Planning Magic and all the blog hoppers you see below!


Friday, November 23, 2012

Saltwater Taffy—12 Weeks of Christmas Treats

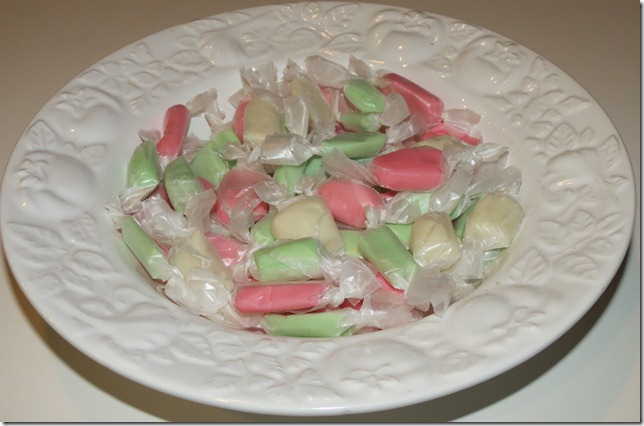
Saltwater Taffy

Saltwater Taffy

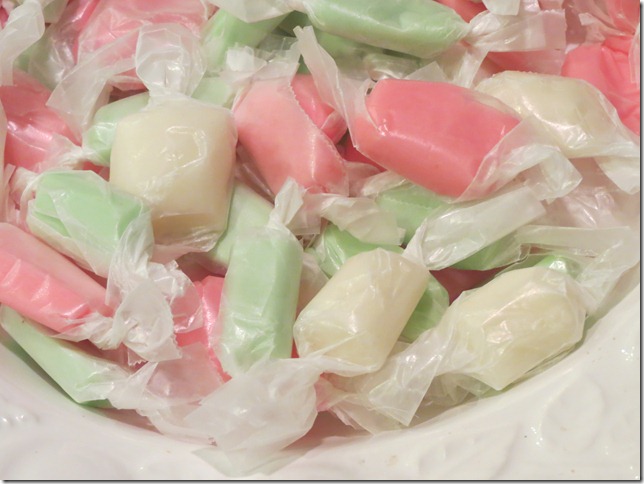
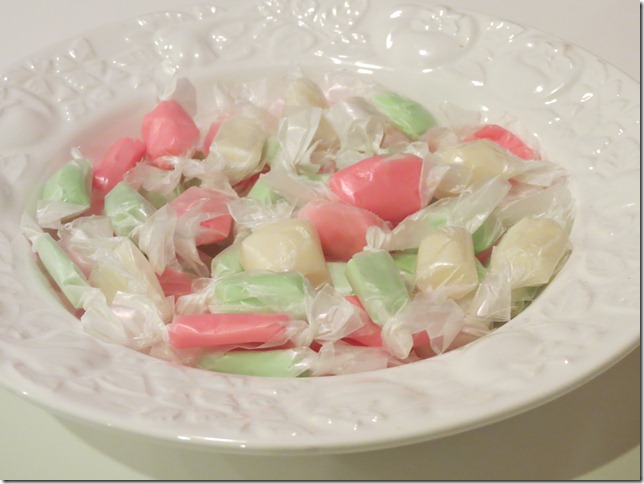
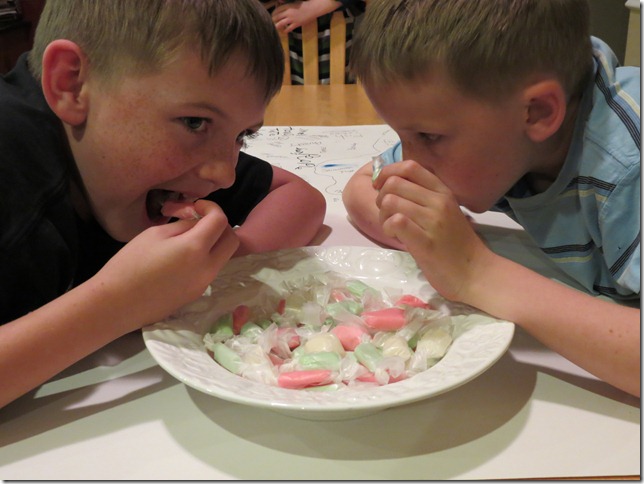
Today’s post is a fun treat to make for the holidays that kids will love helping you make.  A couple days ago, I made Saltwater Taffy and Parker and Taylor ended up helping me.

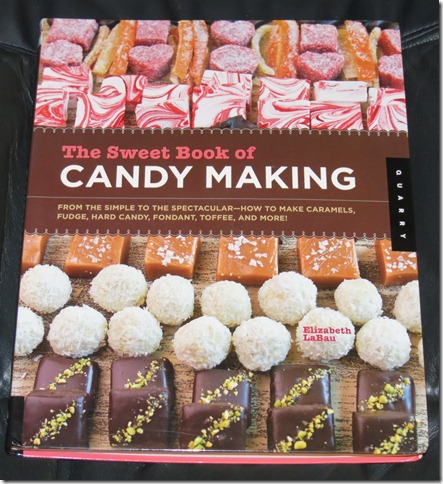
The Sweet Book of Candy Making I got the recipe for the taffy in a GREAT new cookbook I got for my birthday recently.  If you like making candy, you NEED to get this book!  Read this post, then head to this link on Amazon for The Sweet Book of Candy Making, by Elizabeth LaBau, a young pastry chef who is married and has a really cute six month old baby boy.  (Love her, she blogged along with the Tuesdays With Dorie group while we baked from Baking From My Home to Yours and I consider her one of those “friends who I haven’t met yet”.)  She has a delicious blog, too.  Check out Sugar Hero!

Saltwater Taffy 11-21-12

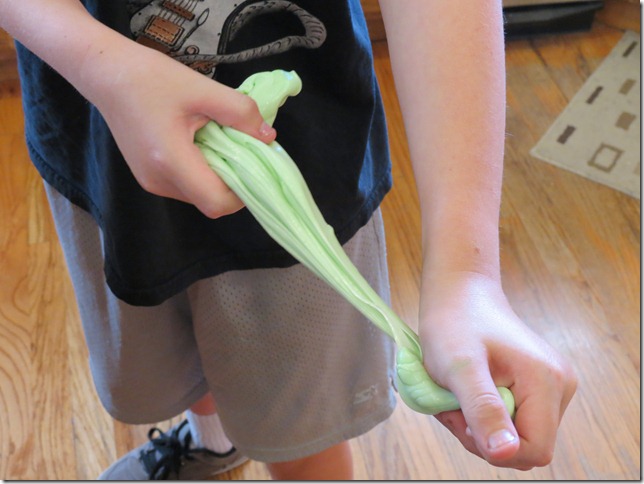
 In the recipe for Saltwater Taffy in the book, Liz shares the wonderful “secret” ingredient—secret because it was new to me, to making softer, chewy taffy, instead of hard tack taffy.  I have made taffy a number of times over the years and have always been frustrated and annoyed that it turns to hard candy, especially if you don’t pull it fast and soon enough.  Should I tell you the secret?  Or should you just have to get the book?  You know what, I’m not going to give you Liz’ recipe, but I’ll tell you that little secret.  After boiling the sugar and adding your chosen flavor, you pour it onto a baking sheet and add a little bit of marshmallow crème.  As soon as it is cool enough, you fold it together and start pulling and incorporated the marshmallow (and coloring). 

I’ll never make taffy again without adding marshmallow crème.  It’s the little things, people. ;) 

So just as I was getting ready to pull the taffy, I had two little helpers comes beg to get to pull some, too.  It was nice to have helpers!  And they were certainly thrilled with the results of making their own taffy.  So much so that after we made the green and white mint flavored taffy, Parker bugged me the rest of the day to make another.

Pulling Taffy

Pulling Taffy

So that night, we made a pink taffy and flavored it with raspberry flavoring.  We also made that one just a little softer and not quite as hard as the first round by not boiling it to quite so high a temperature.  I think it worked well to our advantage because we live at a high altitude. 

Happy Taffy Making Helpers

Happy Little Taffy Making and Eating Helpers

Next time, I want to try banana flavoring, because my favorite Laffy Taffy is banana!  I think licorice flavor would be good, too.  The boys keep snitching the ones we’ve already made, even when I keep trying to hide it in different places.

Saltwater Taffy 3

Thanks again to Brenda from Meal Planning Magic for hosting the 12 Weeks of Christmas Treats.

image

Tuesday, November 20, 2012

Best-Ever Brownies by Rick Katz—Tuesdays With Dorie—Baking With Julia

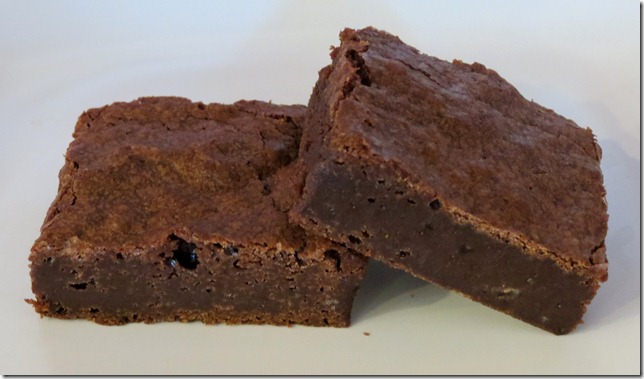
TWD--Best Ever Brownies  (not chilled) 11-19-12

Way back in February of 2010, the Tuesdays With Dorie group made Dorie’s adapted version of these Best Ever Brownies by Rick Katz.  Reading back through that post, I remembered that I didn’t make those exactly as the recipe said, on accident.    So today was my second chance at these brownies, since they happen to be in Dorie Greenspan’s book, Baking From Julia, that the Tuesdays With Dorie group is now working through. 

Now comes the question of whether they are “best-ever”.  This time I did make them exactly as the recipe is written.  They were fudgy and gooey, just as the recipe said they would be.  They are fine.  They are good.  I would have to say in my own opinion, they are not the best-ever of brownies that I’ve made.  Kevin, my husband’s opinion—way too fudgy (he hates fudge—silly, silly man) ;)  He is still not sure he’s had what he thinks would be a perfect, best-ever brownie, but he wants chocolaty and chewy, not fudgy.  I’ve made a few that he really likes and would have to have them all in one place for him to compare.  Sounds fun to me.

I did bake the brownies in a 9x13 inch glass baking pan even though it is suggested to bake them in a 9x9 pan.  When we made them for TWD a couple years ago, I did the smaller pan and decided I’d try them in the bigger pan this time, knowing they would just be thinner brownies.  It worked great!  I think they baked up perfectly in thickness. 

That first photo is brownies I cut as soon as they were at room temperature.  After chilling the brownies for a couple hours (which is what I prefer with brownies, then serving them at room temperature if you’d like), here is the brownies.

TWD--Best Ever Brownies, chilled 11-19-12

If you’d like the recipe for these brownies, Monica blogging at A Beautiful Mess is hosting this week and will have the recipe. 

Thursday, November 15, 2012

Candy Cane Oreo White Chocolate Peppermint M&M’s Rice Krispies Treats—12 Weeks of Christmas Treats

Candy Cane Oreo White Chocolate Peppermint M&M Rice Krispies Treats

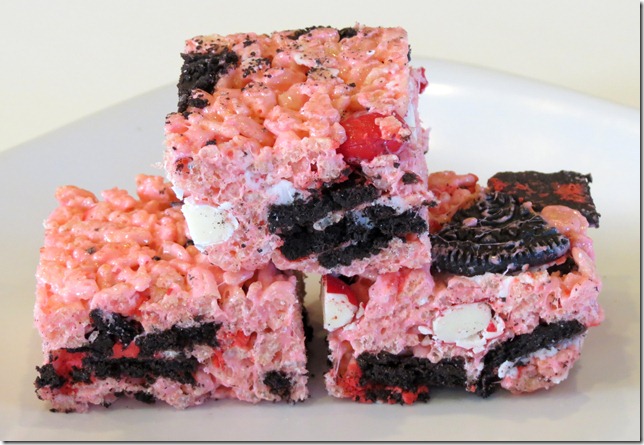
Candy Cane Oreo White Chocolate Peppermint M&M’s Rice Krispies Treats

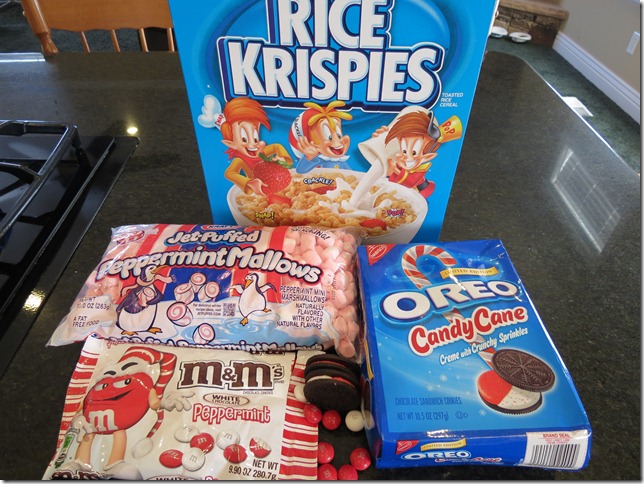
Wow—Now THAT’S a recipe title.  I didn’t want to shorten it or leave anything out.  They could easily just be called Peppermint Rice Krispies Treats or Candy Cane Rice Krispies Treats, but they deserve all the recognition from each addition.  Finish reading this and drooling a little, then run (or drive, I’ll allow that) to your nearest Target and find the new, limited edition Candy Cane Oreos and White Chocolate Peppermint M&M’s, grab a box of Rice Krispies Cereal and some Kraft marshmallows (although if you’re like me, those are things I always have in the pantry).  Better yet, look to see if Target has the new Kraft Peppermint Mallows, which is what I used.  These treats are super kicked up for the holidays and are so good!

The fixin's for super holiday Rice Krispies Treats

The Candy Cane Oreos are one of their best limited editions yet.  They have that Girl Scouts’ Thin Mints taste, but in Oreo form.  They are good.  My kids really like them.  And they are somewhat picky and often don’t like the “new” flavors of things.   One wouldn’t even try them at first, but after doing so, is hooked.

I really like the White Chocolate Peppermint M&M’s, too.  They are strong, but not as much as a candy cane and have that great hint of white chocolate.  The peppermint flavor is the dominate flavor.  I kind of wish it wasn’t quite so strong, but I still love these!  They are easy to snitch a few here and there when they are hiding in your baking closet in an open bag.  (So I’ve heard.)  I don’t have as much of a problem doing that with cookies, but I’m glad I bought two bags of the cookies, because my kids keep snitching those.  And I’ll be back to Target soon for more of the M&M’s before they’re gone!  Run!  How many agree that M&M’s should come permanently in “plain” White Chocolate M&M’s flavor?  Maybe we should all start a petition on their Facebook page or something.  My only wish would be that they just come in regular “plain” M&M’s size.  I kind of think all the new, limited edition, different flavors should just be the regular “plain” size, but they make them a little bigger, I guess so you aren’t confused. ;)

Anyway, these Rice Krispies Treats were delicious!  I made some and took them to a baby shower I attended.  Felt a little bad that it was a shower for a baby boy, but I think they made up for that in flavor and were accepted just fine.  These treats definitely put me in more of a holiday mood. 

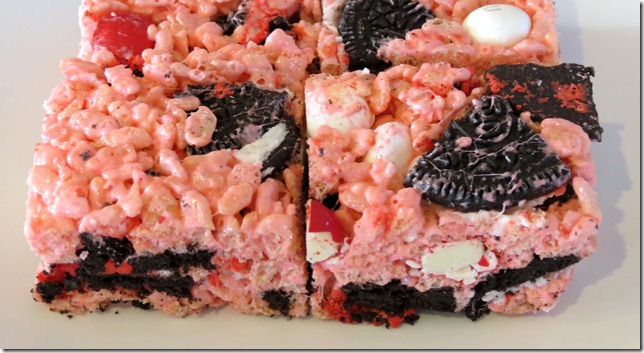
Candy Cane Oreo White Chocolate Peppermint M&Ms Rice Krispies TreatsPerfect for the 8th week of The 12 Weeks of Christmas Treats, hosted by Brenda from Meal Planning Magic.  So nice of her to head up the group and keep it running smoothly each week!

Candy Cane Oreo White Chocolate Peppermint M&M’s Rice Krispies Treats, by Katrina, Baking and Boys!

10 ounce bag of Kraft Jet Puffed Peppermint Mallows (regular mini marshmallows would work, too)

3 tablespoons unsalted butter

6 cups Rice Krispies cereal

15 Candy Cane Oreo Cookies, chopped

about 1 cup White Chocolate Peppermint M&M’s

Line a 9x13 inch baking pan with foil (nonstick is my favorite!), spray lightly with cooking spray.  Chop the Oreo Cookies, set aside.  Put the marshmallows and butter in a large microwave safe bowl.  Microwave for about 40 seconds.  Stir.  Microwave again for 30 seconds.  Stir until butter is mixed in with the melted marshmallows.  (You CAN also do this in a large saucepan, but it takes longer.)

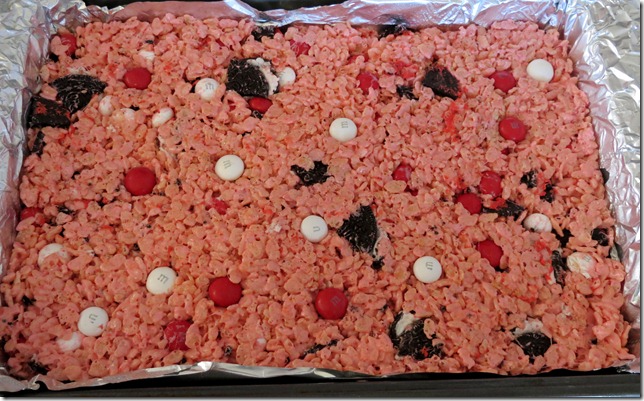
Stir the cereal in to the marshmallow mixture.  When it is all combined, fold in the cookies, then the M&M’s.   Spread the mixture evenly into the baking pan.  I like to tamp it down with a potato masher sprayed lightly with cooking spray to get it even, then I don’t have to have sticky hands. ;)  Let sit on the counter for about an hour to firm up.  Remove from the pan using the foil edges and peel off the foil.  Set on a cutting board and cut into desired sized bars. 

Candy Cane Oreo White Chocolate Peppermint M&Ms Rice Krispies Treats 2

While I think, “Hey, at least wait for Thanksgiving to come and let’s enjoy that before Christmas is here.”  I also know it will be here (and gone) before we know it.  Start making treats—it will get you right in the spirit of it all, at least it has for me.

image

Monday, November 12, 2012

Peach Cobbler and Blueberry Pineapple Pecan Crisp—Lucky Leaf Pie Filling Giveaway

Blueberry Pineapple Pecan Crisp

You might recall back in June with I posted a bunch of delicious recipes and had a giveaway for Lucky Leaf, who make canned premium pie fillings.  I loved trying out some of their fillings and was happy to have a giveaway for a lucky reader as well.  They recently contacted me again and asked if I wanted to try some more of their products.  I received a package with pie fillings, some recipe cards and a nice cloth pie carrier.

I have enjoyed trying a couple of the recipes and now I want to share them with you.  Lucky Leaf has also offered a giveaway again for another lucky winner.  Pictured below is what you could win---some of their pie filling, recipe cards and a kitchen towel.

LuckyLeafGiveaway_HiRes

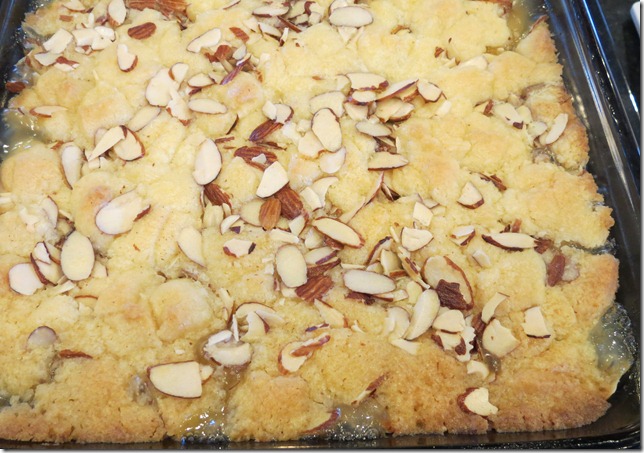
In two of their recipes I have tried, one for an Amaretto Peach Cobbler and a Blueberry Pineapple Pecan Crisp, I made some adaptations to the recipe.  The cobbler was to be made with a packaged sugar cookie mix while the crisp was topped with a packaged yellow cake mix.  So, again (like I did in my last Lucky Leaf post), I made my own cookie dough and yellow cake mix, since I would rather have homemade than boxed treats.  I know, the pie filling is a canned product, but I really like it and love that it doesn’t have high fructose corn syrup.  I would certainly keep some in my pantry for times when a quick dessert is needed.  While as a lover of all things home baked, I hate to say, but my family almost prefers some canned things—like cherry pie filling.  I still have a can of Lucky Leaf cherry pie filling and will be trying their recipe for Cherry Kuchen soon!

The Peach Cinnacake I made last time was a big hit and Kevin really likes peach desserts, so first up, I made the Peach Cobbler.  The recipe is supposed to have Amaretto in it, but since we don’t use or drink alcohol, I left it out.  Peach Cobbler

Peach Cobbler, by Katrina, Baking and Boys! adapted from Lucky Leaf

2  21-ounce cans Lucky Leaf Premium Peach Pie Filling

1 recipe for sugar cookie dough (14  1/2 ounces), see recipe below

1 cup sliced almonds

1/2 cup butter, cubed

Preheat oven to 350 degrees F. 

Make the sugar cookie dough:

1/2 cup unsalted butter, softened

1/2 cup (100 grams) granulated sugar

1/2 a large egg (2 tablespoons or about 25 grams)

1/2 teaspoon vanilla extract

1/2 tablespoon milk

1  1/2 cups (180 grams) all purpose flour

3/4 teaspoon baking powder

1/4 teaspoon salt

Cream together in a mixer the butter and sugar.  Add the egg, vanilla and milk and mix until well combined.  Scrape the sides of the bowl.  Add the flour, baking powder and salt and mix just until combined.

For the cobbler-- 

Spread the two cans of pie filling into an ungreased 9x13 inch baking dish.  Break the cookie dough up evenly into little pieces and sprinkle it evenly over the filling.  Sprinkle the sliced almonds over the top.  Dot the top with the cubed butter.  Bake for 35-40 minutes or until filling is bubbly and topping is golden brown.  Serve warm with whipped cream or vanilla ice cream, if desired.

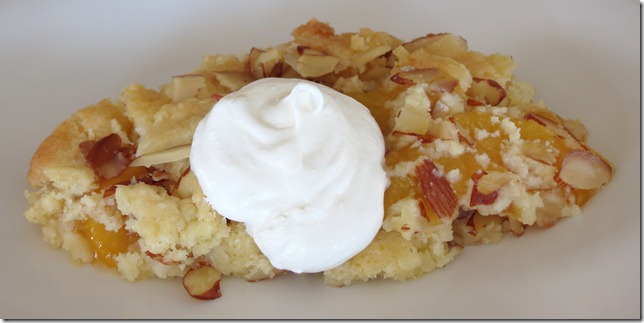
Ready to bake Lucky Leaf Peach Cobbler Ready for the oven—while the Lucky Leaf recipe called for dry sugar cookie mix and I used actual cookie dough, I think it turned out great!

Lucky Leaf Peach Cobbler 2

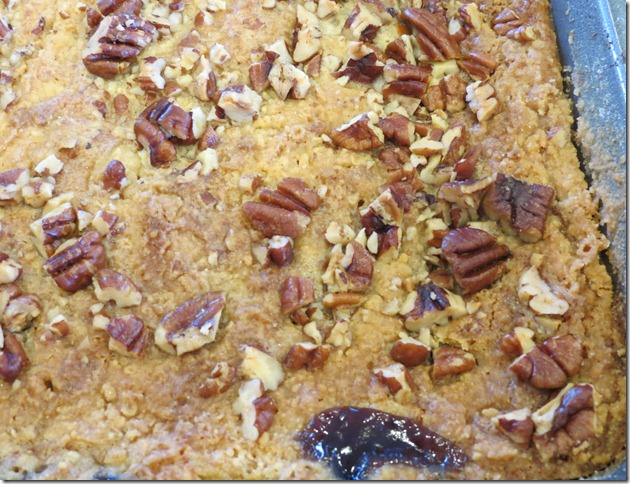
  The BlueberryPineapple Pecan Crisp, which also had crushed pineapple was also delicious and I was very happy with the way it turned out using a homemade dry yellow cake mix!  I looked at different homemade cake mix recipes online, and then adapted a few things to come up with this mixture for sprinkling over the blueberries. 

Blueberry Pineapple Pecan Crisp, by Katrina, Baking and Boys! adapted from Lucky Leaf

For the cake mix--

2 cups (240 grams) all purpose flour

1  1/2 cups (300 grams) granulated sugar

1 tablespoon baking powder

1/2 cup nonfat dry milk (not instant)

1/4 teaspoon salt

1/2 cup cold butter, cut into pieces

1  1/2 teaspoon vanilla extract

In the bowl of a food processor, combine the flour, sugar, baking powder, dry milk and salt.  Pulse a few times to mix together.  Add the pieces of butter and the vanilla and pulse until crumbly and the butter is mixed in to a sand-like texture. 

For the crisp--

1  20 ounce can unsweetened crushed pineapple, undrained

1/2 cup (110 grams) packed brown sugar

1 teaspoon ground cinnamon

1  21-ounce can Lucky Leaf Premium Blueberry Pie Filling

18.25 ounces homemade yellow cake mix (there is about a cup leftover so weigh it if you have a kitchen scale, if not, just measure out a scant cup of the mix—you can use it to make your own microwaveable mug cakes!)*

1 cup pecan halves, chopped

1 cup butter, melted

Preheat oven to 350 degrees F.  Lightly spray with cooking spray a 9x13 inch baking dish.  Pour pineapple into the dish.  Sprinkle with brown sugar and cinnamon.  Top with pie filling and spread it evenly (it will not spread perfectly, but that is okay.)  Sprinkle the dry cake mix and pecans over the filling.  Drizzle with the melted butter.

Bake for 40-50 minutes or until filling is bubbly and topping is golden brown.  Serve warm with vanilla ice cream or whipped cream if desired.

Blueberry Pecan Crisp 2

If you want to win the Lucky Leaf giveaway, here’s what you need to do (you have five entries for chances to win)---

Leave me a comment on this post after visiting the Lucky Leaf Cherry Pie Filling Recipes and tell me which recipe you’d try first.

Like Baking and Boys! on Facebook.  Come back and tell me you did or if you already do, let me know in a separate comment.

Like Lucky Leaf on Facebook.  Come back and tell me in another comment that you did.

Follow Lucky Leaf on Pinterest.  Come back and tell me in another comment that you did.

Follow Lucky Leaf on Twitter.  Come back and tell me in another comment that you did.  #LuckyLeafLuckyMe

The contest is open to U.S. residents only and entries will be accepted until Sunday, November 18 at 7 p.m. CST. 

LET THE HOLIDAY BAKING BEGIN!  Lucky Leaf has lots of great ideas and recipes on their website and Pinterest pages!

Friday, November 09, 2012

Banana Pudding Cookies—Support For Sandy, A Food Blogging Event to Help the Victims of Hurricane Sandy, #FBS4Sandy

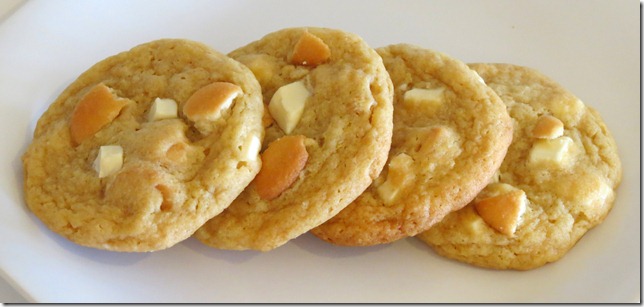
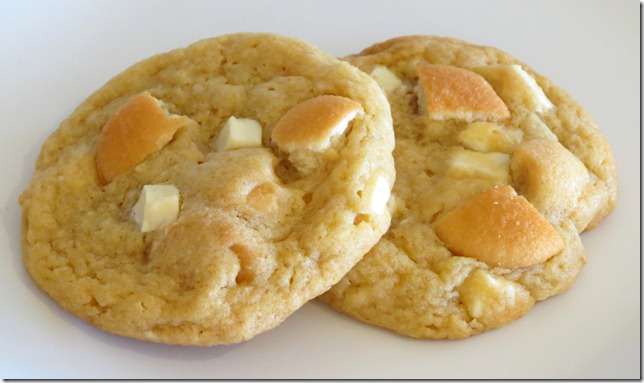
 Banana Pudding Cookies

Though I missed the official posting yesterday, for a food blogging event to help the victims of Hurricane Sandy, they are letting whoever wants to join in post anytime through the month of November.  After seeing and hearing all about the devastation caused to the East Coast from Hurricane Sandy, I didn’t want to pass up the opportunity to share in a very small way with those who have lost so much and who are still suffering.  While I know that we all think we couldn’t possibly do enough to really help someone, every little bits counts.  It all adds up. 

What is the next best thing to helping monetarily?  Comfort.  It brings people together, gives warmth and genuine love, and shows concern—especially when you’re talking about comfort food.  ;)  So just as a way to have all our Support for Sandy posts come together with some kind of unity, we all decided to post something we think of as comfort food.  And now you’re probably rolling your eyes that I have chosen cookies.  I do believe my cookies bring comfort to many, so I just couldn’t bring myself to make meatloaf or chicken noodle soup.  Though one of the hosts for this Support for Sandy group is Barbara at Creative Culinary and she has posted some mighty good-looking meatloaf!  You will also find on her post all the other comforting foods and recipes by all the other bloggers participating in the event at the end of her post.

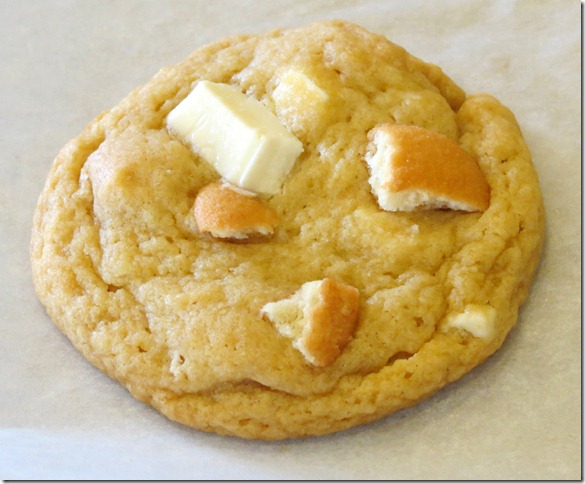
Banana Pudding Cookies 3  A couple months ago I saw a post Maria at Two Peas And Their Pod did for some Banana Pudding Cookies.  I have wanted to make them since then.  I bought some banana pudding mix a while ago and already had the Nilla Wafers.  I didn’t adapt Maria’s recipe much.  The biggest differences were that I used chopped Lindt White Chocolate when she used white chocolate chips.  I don’t really like white chocolate chips—they are just never as good as the real thing. ;)  The only other things I did were changing or adding to some of her directions for making the cookies.   Banana pudding, with vanilla cookies and whipped cream is definitely a comfort food—putting that comfort in to a cookie—even more comfort in my book.

Banana Pudding Cookies, adapted by Katrina, Baking and Boys! from Maria at Two Peas and Their Pod

1 cup unsalted butter, room temperature

3/4 cup packed light brown sugar (165 grams)

1/4 cup granulated sugar (50 grams)

1 (3.4 ounce) package banana cream instant pudding mix

2 large eggs

1 teaspoon vanilla extract

2  1/2 cups all purpose flour (300 grams)

1 teaspoon baking soda

1/2 teaspoon salt

1 cup chopped vanilla wafer cookies (like Nilla Wafers), plus more for the tops of the cookies

4.4 ounces Lindt white chocolate bar, chopped (save some of the tops of the cookies)

Preheat oven to 350 degrees F.  Line baking sheets with parchment paper.

Cream together in the bowl of a mixer the butter and sugars until light and fluffy.  Add the dry pudding mix, eggs and vanilla extract.  In another bowl, whisk together the flour, baking soda, and salt.  Add the dry ingredients to the creamed mixture and mix just until combined.  Stir in the chopped chocolate and wafer cookies.

Put cookie dough on baking sheets using a cookie scoop or about walnut-sized mounds of dough about two inches apart.  Press each cookie dough ball down slightly with the palm of your hand.  Put extra  white chocolate and chopped wafer cookies on the tops.  Bake the cookies for about 12 minutes.  Remove the cookies from the oven and using the edge of a metal spatula, carefully push the cookies into round forms as some will have spread to a not-so-round shape.  (This is a trick I do with all cookies to get uniformly round cookies!)  Let the cookies cool on the baking sheets for about 5 minutes then transfer to a wire rack to cool completely.

Banana Pudding Cookies 4

If you like and are comforted by banana pudding, these cookies are for you!  Comfort in a cookie!

Don’t forget the purpose of this post—let’s all unite together in Supporting the victims of Hurricane Sandy.  Click on the Support For Sandy image and it will take you right to the Red Cross website where you can donate—every dollar counts.  I can’t give much, but am happy to give a little.

Thanks to Barbara at Creative Culinary and Jenn from Jenn Cuisine for putting this together.


Other sources to see where you can help are also listed--

  • American Red Cross is providing food, shelter, and other forms of support to hurricane victims. You can donate directly to the Red Cross or  you can also text the word “Redcross” to 90999 to make a $10 donation.
  • The Salvation Army is also focused on providing food, shelter, and support to victims, and takes donations for storm relief.
  • Feeding America is providing food, water and supplies to those who need it as part of their disaster relief program.

Check out all the chatter on Twitter for Support For Sandy with the hashtag #FBS4Sandy.  Thanks!

Thursday, November 08, 2012

Cinnamon Chocolate Chip Banana Cake Truffles—12 Weeks of Christmas Treats

Banana Cinnamon Chocolate Truffles 9-20-12

Week 7 of the 12 Weeks of Christmas Treats and I know what you’re thinking—those don’t look very Christmas-y.  Well, use your imagination and pretend they are red, green and white.  See, they’d be perfect!  I made these a couple months ago for a baby shower I hosted and have been wanting to blog them since, but haven’t found the opportunity to do so.  I decided you need to know about them, so here you go.

I really don’t take any credit for the idea for these.  Back at the end of August (which seems like just yesterday, or maybe like a week ago anyway), Dawn at Vanilla Sugar posted some Banana Bread Balls she made using banana bread (obviously) instead of the ever-popular cake balls.  After I saw those, I knew I wanted to try them because I. LOVE. BANANAS.  (You are what you eat, right?)  I also don’t really care for cake balls.  Mostly because I don’t like cake mixes or canned frosting, which seems to be “the thing” for cake balls.  I have tried them in the past with homemade cake and frosting and they did turn out well, but have still never really made cake balls all that much. 

Dawn made hers with banana bread and cream cheese, then dipped them in melted chocolate and sprinkled them with walnuts.  YUM!

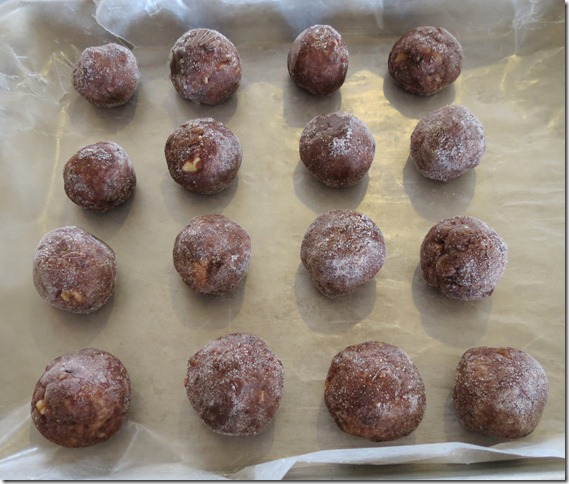
Well, I stumbled upon a little boo-boo I made in the kitchen back in September.  I made my most favorite cake in the world--Banana Chocolate Chip Coffee Cake, but thought I’d try it in a bread pan and make a banana “bread” that had a swirl of cinnamon-walnut-chocolate chip streusel in the middle and on top, like the cake.  I believe it would have worked just fine in the bread pan, but took it out of the oven too soon, so the bread sunk a little in the middle.  That doesn’t make me very happy, but I wasn’t about to throw out the cake/bread.  Having Dawn’s Banana Bread Balls in mind, I just started taking some of the cooled cake and forming it in to walnut-sized balls.  I stuck them in the freezer. 

Cinnamon Chocolate Chip Banana Cake Truffles 5

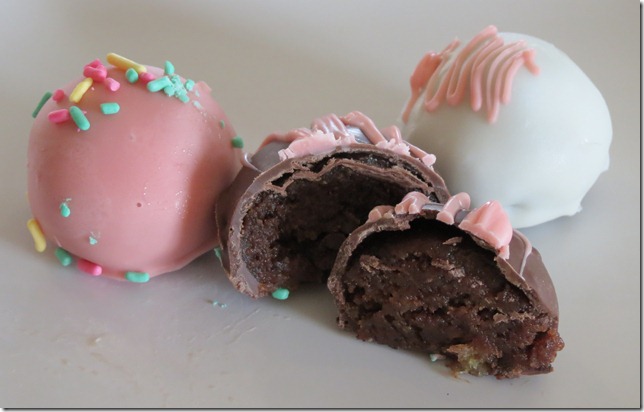
That’s where the baby shower I mentioned comes in to play.  I remembered those lonely cake balls in the freezer and decided they would be really fun to dress up for a girly baby shower.  I chose to use candy melts for dunking them and used white and pink and some chocolate bark. 

Banana Cinnamon Chocolate Chip Cake Truffles Cute.  Fun.  Yum!  Before telling shower guests what they were, they were all trying to guess what flavors were in them as they ate them.  Did I mention I love this coffee cake?  It has, of course, bananas and the swirl/top layer has mini chocolate chips, cinnamon and walnuts, along with brown sugar.  Because I use mini chocolate chips and some pretty finely chopped walnuts, they were fine when forming the cake in to balls.  The cake was cool, but still fresh, so the chocolate chips kind of melted in with the cake as I formed the balls.  It was all good!

Banana Cake Truffles Cinnamon Chocolate Chip Banana Cake Truffles, by Katrina, Baking and Boys!

For the cake--

Banana Chocolate Chip Cinnamon Coffee Cake, by Katrina, Baking and Boys!, adapted from Bon Appetit 2003

3/4 cup mini chocolate chips

2/3 cup light brown sugar, packed

1/2 cup walnuts, chopped and toasted

1/2 tablespoon ground cinnamon (heaping)

1  1/2 cups unbleached all purpose flour

3/4 teaspoon baking soda

3/4 teaspoon baking powder

1/4 teaspoon salt

3/4 cup granulated sugar

4 ounces coconut oil (original recipes uses 1 stick unsalted butter--I was actually out of butter (gasp), but loved how this turned out with the coconut oil

1 large egg

1  1/3 cups very ripe banana, mashed (I used about 4 small-medium bananas)

3 tablespoons buttermilk

Prehead oven to 350 degrees.  Butter and flour an 8 inch square pan (although I used a 10 inch round springform pan and it worked great!)  *Or try a 9x5 inch bread pan—bake for 50 minutes, then check for doneness and adjust accordingly. I probably baked the bread pan cake for 50-55 minutes and it could have used another 5 minutes.  It was not doughy, just sunk in the center.

In a medium sized bowl, stir together the chocolate chips, brown sugar, walnuts, and cinnamon.  Set aside.

In another bowl, whisk together to sift the flour, baking soda, baking powder, and salt.  Set aside.

In the bowl of an electric mixer (this can be done all by hand if you use the oil as opposed to butter which beats together with the sugar better in a mixer), beat coconut oil and sugar until well combined.  Add egg and beat until fluffy.  Stir in mashed bananas and buttermilk.  Add dry ingredients and blend well.  Spread half the batter in prepared baking pan.  Sprinkle half the streusel evenly over the first half.  Spread the remaining batter over that and top with the rest of the streusel topping.  Bake until toothpick inserted in center comes out clean (the original recipes says 45 minutes), with my bigger pan, I only baked it 25 minutes.  Cool on wire rack.

For the coating and cake truffles instructions:

6-8 ounces white candy melts

6-8 ounces pink candy melts

6-8 ounces chocolate bark or candy melts

sprinkles for decorating

*Use any colors you’d like for any holiday or event.

Once the cake is cooled, form into walnut-sized cake balls, form it to hold together my squeezing it in your hand.  Set them on a waxed paper lined baking sheet, then cover with plastic wrap.  Freeze until firm, or once frozen, put them in a plastic zip top bag and freeze up to 2 months. 

When ready to coat the truffles, remove them from the freezer. 

Melt the candy according to package directions in a microwave-safe bowl.  Dip the frozen cake truffles in one color at a time.  If the melts are hardening, you can microwave it again until it is the consistency you want.  Dip one cake truffle into the melted candy while it is sitting on a fork.  Bring it out of the candy and tap the fork lightly on the side of the bowl to drip off the excess.  Set on a baking sheet lined with waxed paper using another fork to slide it off the dunking fork.  Sprinkle immediately.  If using another color to drizzle over the truffles, you can do that after all of them are made. 

image