Showing posts with label Cheese. Show all posts

Sunday, May 04, 2014

Canadian Honey Drop Cookies, Gluten Free—Secret Recipe Club

Canadian Honey Drop Cookies, gluten free 2

I am a big cheater.  Besides making these cookies gluten free and using unrefined sugar (no big deal), instead of sandwiching them with jam/jelly which was indicated in the recipe, I used chocolate and peanut butter.  I can’t help it.  I didn’t have any sugar free jam, so it’s not really my fault and these are then healthier than if I would have used a sugar-laden jam.  Am I right?  Instead I used a combination of all natural peanut butter, a touch of raw honey and some melted Enjoy Life chocolate chips.  Win---WIN!

These cookies were really good.  I found them on my Secret Recipe Club blog assignment for May.   My blog assignment was Anna’s blog, Cheese With Noodles.  Anna lives in Alaska with her husband, bunnies and cat.  She’s crafty, likes gardening and cooking and baking.  I like her!

She got this Canadian Honey Drop Cookies recipe from the 1963 Betty Crocker Cooky Book.  I would love to have a copy of that one!  I like that she pointed out that these cookies aren’t Canadian and they aren’t drop cookies, really.  But that doesn’t matter if you make them and like them, right?  When I saw that they are made with brown sugar and I had just recently bought some organic brown sugar, as well as with honey, I knew these were the cookies I had to make.  I’m happy I did.  I actually ate most of these cookies individually with no filling to sandwich them.  They are good by themselves!  I was thinking of drizzling them with melted chocolate, then I thought of what my favorite thing is with honey and knew I needed to put some peanut butter in them.  Man, I sure miss a good ol’ peanut butter and honey sandwich! 

Canadian Honey Drop Cookies with penaut butter chocolate fillingYes, I could have just eaten one cookie topped with the peanut butter-chocolaty goodness, but that would not have been very lady-like and would have been kind of a drippy mess.  So, a sandwich it was!  Check out the recipe Anna posted.  Here’s my gluten free version.  I also used coconut oil instead of shortening, though I might try them again with some organic Spectrum palm shortening.  Anna’s cookies were pretty thick and mine were soft and flat (still good!).  If I make them again and don’t plan to sandwich them, I will use shortening.  I have found that coconut oil really spreads with cookies.  I knew it would when I made them this way, so it is all good.

Canadian Honey Drop Cookies--May SRC

Canadian Honey Drop Cookies, Gluten Free, by Katrina, Baking and Boys!

1/2 cup coconut oil, 112 grams (or organic Spectrum palm shortening)

1/2 cup organic cane brown sugar, not packed (80 grams)

1 large egg

3 tablespoons raw honey (63 grams)

1/2 teaspoon vanilla extract

1  3/4 cup gluten free flour blend (196 grams) (I used Premium Gold ancient grains gluten free blend)

1/4 teaspoon salt

1 teaspoon baking soda

*Optional filling

Jam/Jelly of your choice

Natural Peanut Butter

Combination of peanut butter, honey, melted Enjoy Life chocolate chips

Beat together well the oil/shortening with the brown sugar.  Add the egg and beat well.  Add the honey and vanilla a mix until fluffy.  In a separate bowl, combine the flour, salt and baking soda.  Stir it into the sugar mixture until all combined.  Cover the bowl and refrigerate dough for a couple hours (be careful, refrigerating something with coconut oil, hardens it up quite a bit, but I was still able to form dough balls).  The chilling step may not be necessary if using shortening. 

Preheat oven to 350 degrees F.  Line baking sheets with parchment paper.  Roll dough into one inch balls.  Place on baking sheets about 3 inches apart.  You can flatten them slightly with your hand if you’d like them flat, which works well for a sandwich cookie.  Bake for 8-10 minutes until cookies are lightly browned.  Let cool on baking sheet for about 5 minutes before moving to a wire rack to cool completely.   Fill cookies with jam or optional peanut butter/chocolate mixture, if desired.  Makes 16 cookies

Peanut Butter Filled Canadian Honey Drop Cookies, Gluten Free

I filled one with just peanut butter and it was a bit runny/messy.  Still tasted great though!  The melted chocolate really helped hold the filling inside, especially after I refrigerated it for a short time.

My newest plan/goal with my Secret Recipe Club assignments is to also make a savory dish from the blog.  You might have noticed, I always go right for cookies or some other dessert.  That’s just who I am.  But I actually eat quite healthy as well, especially after being diagnosed with MS and going gluten free and off refined sugars and most processed foods.  It’s been an interesting road to go down.    I miss certain things, like a good old plate of pasta or some delicious homemade whole grain bread……….so looking through Anna’s blog, I wanted to find something to make for dinner one night.  My family seems to get tired of the same number of things we have often.  While I make spaghetti a lot and one other pasta dish that is made with an Alfredo sauce, I wanted to find something else.  I ran across the Dreamy Baked Ziti she posted in March of last year.  I decided we need to try a new pasta.  Anna spoke about how this was a new favorite with lots of creamy cheese and a flavorful tomato sauce.  I liked that it did not have ground beef in it.  I was a little skeptical that my family would not like it having no meat in it, so at the last minute, I tossed some chopped pepperoni into the sauce.

Besides that addition, I made just a few slight changes, so I’m not going to retype the recipe, that Anna got from Mel’s Kitchen CafĂ©, who got it from Cook’s Illustrated.  It’s like making a lasagna with an ample amount of a creamy cheese mixture full of lots of mozzarella and parmesan.  This mixture called for some dried parsley, but I used fresh chopped parsley. 

Creamy Baked Ziti 4-30-14

Just before I added the pepperoni to the sauce, I took a scoop of it and a scoop of the cheese mixture and made me a little portion of gluten free pasta.  I made a perfect one-serving ramekin of this Dreamy Baked Gluten Free Ziti for me.  I thought it was delicious!

Gluten Free Baked Ziti

I sure wish I would have made more of it for me for other meals!  This was a heavenly “splurge” meal for me and I would do it again in a heartbeat. ; )

Gluten Free Dreamy Baked Ziti

I will for sure make the ziti again…..sometime….soon.  So many delicious recipes on Anna’s blog, Cheese With Noodles. 

image

Tuesday, March 26, 2013

Baked Mozzarella Sticks

Baked Mozzarella Sticks 3-21-13

I made these last week on a night Kevin had to work late.  The boys LOVED them.  I only made 16 of them and they were upset when they were all gone.  They were easy to make and so much better than the over-battered fried ones, in my humble opinion. ;) 

I’ve learned a few things since making them.  I made them for dinner again last night.  This time I used a different brand of mozzarella sticks than I’d used the first time and just for fun, I didn’t cut them in half.  In my recipe, I’ll recommend a certain brand of cheese, but you are welcome to try whichever you like.  And now I’ll make sure to cut them in half as well, not sure if that helped cause the melting, but there was also a difference in the thickness/roundness of the two brands of cheese and I actually baked a few of each last night and the ones I’d used the first time didn’t melt like the other brand. 

Anyway, these were great and perfect for pleasing kids.  I used a simple store-bought pizza sauce (gasp!) this time, because I just happened to have some on hand.  Any marinara sauce would be great for dipping these in.

These are made by dipping each stick in flour, then egg, then seasoned breadcrumbs with Panko crumbs and a couple other things added.   They are then baked for a short time and ready to eat!

Skinny Baked Mozzarella Sticks 3 I found the recipe for these at Skinny Taste and have adapted it slightly. That recipe notes that it makes 24 sticks, but I barely had enough egg for 16.  You can use another egg and easily get 24 with the remaining flour and breadcrumb mixture.

Baked Mozzarella Sticks, by Katrina, Baking and Boys!, adapted from Skinny Taste

8 sticks Frigo Cheeseheads part-skim mozzarella string cheese sticks, cut in half, frozen  (recommended, but other brands may work)

1 large egg, beaten

1/4 cup all purpose flour

5 tablespoons Italian seasoned breadcrumbs

5 tablespoons Panko crumbs

1 tablespoon parmesan cheese, finely grated

1 tablespoons dried parsley

Cooking Spray (I used an olive oil spray)

Marinara Sauce, for dipping

Preheat oven to 400 degrees F.  Line a baking sheet with aluminum foil and spray with cooking spray.  Keep cheese sticks (already cut in half and frozen) in the freezer until ready to use.

Prepare three separate dishes, one with the flour, one with the egg and one with the breadcrumbs, Panko, parmesan cheese and parsley.  Remove the cheese sticks from the freezer and working quickly dip each stick first in the flour, then the egg and finally the breadcrumb mixture.  Set them on the foil-lined baking sheet.  If your oven isn’t preheated yet, stick the sheet of prepared sticks in the freezer.  (They need to stay frozen right up until they go in the oven!)

Spray the tops of the prepared mozzarella sticks with cooking spray and bake 4-5 minutes.  Turn each over and bake another 4-5 minutes.  Start with 4 minutes, checking to make sure they don’t melt.  Makes 16.

3-21-13

Simple and delicious!


Wednesday, October 03, 2012

Caprese Sticks and Tomato Mozzerella Pesto Puff Pastry Spirals---For A Virtual Bridal Shower

Caprese on a Stick for Jessica's bridal shower 10-1-12

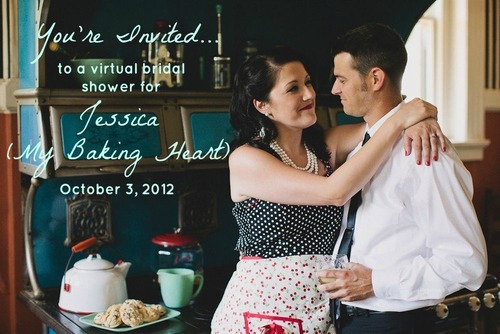
Today I’m joining with some other bloggers for a Virtual Bridal Shower for Jessica from My Baking Heart!  She’s getting married—soon!  Nikki at Pennies on a Platter is hosting Jessica’s bridal shower.  She’ll have a round up with all the bloggers’ posts with links to their delicious contributions for the shower.  I can’t wait to see it!

I’ve known Jessica in the blogging world almost the whole time I’ve been blogging, since she has always been involved with Tuesdays With Dorie even all through Baking From My Home to Yours.  She is also faithful with the French Fridays With Dorie group who are cooking and baking their way through Dorie Greenspan’s Around My French Table cookbook.  I tried to keep up with that group, but was finding it too hard to keep that up weekly along with all the other things I’m doing.  Jessica almost never seems to miss a post.  Now we both continue Tuesdays With Dorie as this year we’ve started baking our way through Baking With Julia.

I decided to make an appetizer for the shower.  Actually, I ended up making two.  First of all, with my always blooming AeroGarden full of basil, I kept thinking about these little tomato-mozzarella-basil sticks—perfect bites sitting on a plate drizzled with balsamic syrup. 

Caprese Sticks, by Katrina, Baking and Boys!

cherry/grape tomatoes

fresh mozzarella pearls

basil

balsamic vinegar

First, in a small saucepan over low heat, reduce some balsamic vinegar.  About 1/4 cup of vinegar will reduce to 1-2 tablespoons and will thicken into a syrup consistency.  Let it cool while preparing the caprese sticks.  First add a tomato to the stick, then a small basil leaf and end with a mozzarella pearl.  Make as many as you’d like.  Drizzle some of the syrup on a plate or serving platter (it looks the best on a white plate).  Set the prepared sticks on the syrup.

*If you find one whole basil leaf too strong on each stick, you can tear them smaller or use smaller leaves.  I think they are good, but some might think it a little strong.

10-1-12

Love that balsamic reduction!  Caprese is one of my favorite flavor combinations.  These were super simple to make.  I love that the mozzarella pearls aren’t round, but look more like gems. 

I also recently made some pesto puff pastry spirals for a baby shower I hosted.  I actually make them for all kinds of occasions.  Sometimes the spread on them is a little different, in the past I have spread them with some sauteed spinach with garlic, cooled and chopped finely, but they are almost always sprinkled with chopped roasted red pepper, mozzarella cheese and parmesan cheese.  Roll up each side of the puff pastry and slice into spirals. 

Tomato and Pesto Cheese Spirals 9-27-12

Love the light, crisp, flakiness of these and the pesto and cheese flavor is delicious!

Tomato Mozzarella Pesto Puff Pastry Spirals (2)

Tomato Mozzarella Pesto Puff Pastry Spirals, by Katrina, Baking and Boys!

2 sheets of puff pastry, thawed

about 4 tablespoons prepared pesto (or store bought)

1/4 cup finely chopped roasted red pepper

1/4 cup tomatoes, chopped small (optional)

1/2 cup grated mozzarella cheese

1/4 cup grated parmesan cheese

*Other times, I have also added some finely chopped artichoke hearts and/or some finely chopped sauteed spinach with garlic (cooled before spreading over the pastry).

Preheat oven to 400 degrees F.  Line two baking sheets with parchment paper.

Lay one puff pastry out flat on a lightly floured counter.  If any of the seams are slightly torn, pinch them together with your fingers.  Roll with a rolling pin the puffy pastry (which will also help seal any tears) until it is a little thinner than it is originally. 

Spread evenly about 2 tablespoons of the prepared pesto (or sauteed/cooled spinach, may use or need more per sheet of pastry, it’s really to taste) onto the puff pastry.  Next sprinkle on the red pepper and if using, the tomato and artichoke.  Sprinkle on half the mozzarella cheese and parmesan.  Roll from the long ends of the pastry each side to half way.  Slice the rolled pastry into 15-17 slices and lay each spiral flat on the baking sheet.   Bake for about 20 minutes until golden and crispy and the cheese is melted.  While the first sheet is baking, prepare the second sheet the same way.  Serve slightly warm.

Tomato Mozzarella Pesto Puff Pastry Spirals 3

I always eat way too many of these.  ;)

So fun to be part of Jessica's virtual bridal shower!  Thanks again for inviting me, Jessica, and for hosting the party, Nikki.  Check out what everyone brought to the party at Nikki’s blog!  Congratulations on your upcoming marriage and wedding, Jessica!  Enjoy your day! 

 Love this picture/invitation!

Tuesday, April 03, 2012

TWD—Baking With Julia—Pizza Rustica

TWD Pizza Rustica

Pizza Rustica—sounds like pizza, but is more like a quiche or savory pie.  We made that this go-round for Tuesdays With Dorie--Baking With Julia.  It is fun to be making these recipes in Baking With Julia now.  I like that we go from simple Irish soda bread to something more involved like Rugelach or this Pizza Rustica.

I like the pie.  Even though I used a low fat ricotta, I know that this “pizza” is not really low fat, so I’ve tried not to eat too much of it.  My only problem with it was the crust.  It was quite a wet dough, did not specify any chilling time and I could not get it to roll out without sticking like crazy to my well-floured surface.  I persevered and ended up pressing the bottom crust in to the pie plate.  Since the top crust wasn’t going to cooperate with being rolling out and cut into lattice strips, I cut it into fun circles and placed them over the top of the pie.  The little circles were much easier to work with getting off the counter. 

I was happy that I even decided while buying ricotta to get some prosciutto instead of just using ham or bacon like I was going to and it was really good.  The only change I made to the whole recipe was that I used low fat ricotta instead of whole milk.

Pizza Rustica

I think this would be good with a different crust, like just a regular pie crust.  Not sure what my problem was with this one, but I followed the recipe exactly.  Maybe the original recipe came from someone who measures flour with a heavy hand.  I weighed mine.  Either way, this is a great pizza pie for a brunch or even breakfast or lunch, whatever, you could have it for dinner, too.

If you want the recipe, Emily from Capital Region Dining or Raelyn from  The Place They Call Home are the hosts this time and they’ll have the recipe posted for you.  Lots of Pizza Rustica viewing for your hungry eyes over at TWD Headquarters.

Thursday, March 10, 2011

Lower Fat Macaroni and Cheese with Ham and Peas

DSCF4039

I hate to say it, but I’m the type who HAS to eat lower fat, healther foods in order to stay at the weight I’m at, and/or keep on exercising like crazy to maintain or lose weight.  Oh how I wish I was the type that could just eat whatever I want whenever I want.  Sigh.  (I know, there are many others just like me.)  I know it’s good for me to watch what I eat, and I know that by doing so there are times when I can splurge.  So as much as you would look at my blog at all the things I post here and think what an unhealthy household we have, that isn’t really the case.  I cook mostly healthy food and am always happy when I take a recipe that looks so good and make some healthier adaptations to it and it still turns out great.  So I had to share this recipe with you today.

The recipe  I used was recently posted by my friend, Amanda, on her blog, Amanda's Cookin'.  She adapted a recipe she’d found on Allrecipes.com.  When I saw her post, it really made me want some good ol’ mac-n-cheese.  I made a few changes and still came out with a creamy, cheesy comfort food dish that has been great to eat all week!

Lower Fat Macaroni and Cheese with Ham and Peas, by Katrina, Baking and Boys!, adapted from Amanda’s Cookin’

13.25 ounce box of whole wheat macaroni pasta

1 tablespoon olive oil

10 ounces cooked ham, diced into about 1/4-1/2 inch pieces

1/4 cup water (chicken stock or dry wine would work, too)

1  1/2 cups frozen peas

4 tablespoons Best Life Buttery Baking Sticks (or any other butter substitute)

4 tablespoons all purpose flour

1 teaspoon salt

1/4 teaspoon ground black pepper

1/4 teaspoon paprika

1/4 teaspoon ground dry mustard

2 cups fat free (skim) milk

1 cup shredded 75% reduced fat sharp cheddar cheese

1/2 cup shredded smoked gouda

1/2 cup shredded Manchego cheese (any kind of cheese would really work, it’s the smoked gouda that is the winner here, you could probably just use 1 cup all gouda)

3/4 cup Panko bread crumbs

Preheat oven to 350 degrees.  Light spray a 9x13 inch baking dish with cooking spray.  Set aside.  Bring a large pot of water to a boil over high heat.  Once it’s boiling, cook the pasta until al dente according to package direction.  While the pasta is cooking, heat olive oil over medium-high heat in a large skillet with at least 2 inch sides.  Add chopped ham and saute until meat begins to brown, about 2 minutes.  Add water and simmer until liquid is almost evaporated.  Add peas and cook another 2 minutes. 

Remove the ham and peas from the skillet and set aside.  Heat the butter (substitute) in the skillet until it has melted and stopped sizzling.  Combine the flour, salt, pepper, paprika and dry mustard in a small bowl.  Add the flour mixture to the butter and use a whisk to combine the butter and flour together to make a roux, whisk for a good minute or two to cook out the raw flour taste.  While slowly adding the milk, continue whisking to combine.  Turn the heat up slightly and whisk often until the milk thickens.  Do not let it come to a boil, just heat enough to thicken.  When thickened, remove the skillet from the heat and add the shredded cheeses.  Whisk until combined and melted. 

Drain the macaroni and place in the skillet, along with the ham and peas, with the cheese sauce and stir until well combined.  Pour into the 9x13 inch pan and top with the panko bread crumbs.  Bake for 20 minutes.

DSCF4038 

The only thing I would do different next time is only cook about 10 ounces of pasta so there is a little more cheese mixture ratio to the pasta.    This is great with the bites of ham and peas and makes for an easy dinner.

Thursday, July 29, 2010

July Cookie Carnival—Pillsbury Oatmeal Raisin Cookies & Thyme-Cheese Crackers

We had two choices for the July Cookie Carnival this time around.   One was for Pillsbury's Oatmeal Raisin Cookies.  These are GREAT oatmeal cookies.  I made them back at the beginning of July for our family reunion and they were a big hit.  I’d also made some other oatmeal cookies for the same event and this Pillsbury recipe by far was better than the other.  These were the perfect thickness, crispiness, chewiness and had great taste.  I will for sure make this recipe again—over and over.

DSCF4333

Get the recipe off the Pillsbury link above, but know that I made a few small changes.  I used salted butter and omitted the salt in the recipe.  (Just happened to be what I had at the time.)  I also used white whole wheat flour instead of all purpose flour.  I would totally do that again—as soon as I find a store around here that sells white whole wheat flour.  I’m out and haven’t found any yet.  Sigh.  I haven’t looked farther than our two closest stores, so I know I’ll find it. 

DSCF4330 

___________________________________________________________________________________

Another recipe we could choose to make for July for Cookie Carnival was for Rosemary-Cheese Spritz Cookies from the Food Network Kitchens.  I decided to make those, too.  But I’m not calling mine that.  They are hereafter known as Thyme-Cheese Crackers.  I don’t love the taste of rosemary.  Mostly when it’s the only herb in something.  I think it’s okay when it’s mixed with other herbs.  As I was making the dough for the crackers, I actually was just going to leave any herbs out, but as the mixer was stirring for the last few rounds, I decided to throw in some dried thyme.  (The rosemary recipes calls for fresh rosemary.  I wish I’d had some fresh thyme.)  I can’t wait to start growing some herbs here.  Probably won’t happen this summer, but I did just buy a few basil plants and a pot and started those growing.  Basil is probably my favorite herb.

Back to the crackers.  The original recipes has you make the dough and put it in a cookie press, which is why they call them cookies.  These are not cookies.  They are crackers.  Cheese crackers.  I don’t have a cookie press.  Someday.  I chilled the dough, rolled it out, froze it for 15 minutes or so, then cut shapes out of the dough.  (The cookie press dough was way too sticky to roll out as cut outs.)  I’ve made cheese crackers before.  They are good and a little addicting.  But the ones I’ve made before are made with cheddar cheese.  This recipe calls for Pecorino and Parmesan.  Yum.

IMG_2248 

These are crispy and cheesy and flaky and again, addictive.  Here is the recipe as I made the crackers.  (I halved the recipe provided by Food Network.)

Thyme Cheese Crackers, by Katrina, adapted from Food Network-Rosemary Cheese Spritz Cookies

1/2 cup unsalted butter, softened

1/2 teaspoon finely grated lemon zest

1/2 an egg yolk (1 yolk was 14 grams, so I used 7 grams of yolk)  (GET A KITCHEN SCALE!)

3 tablespoons heavy cream

1/2 cup plus 6 tablespoons all purpose flour (105 grams)

6 tablespoons finely grated Pecorino cheese (30 grams)

1/4 cup finely grated Parmesan cheese (28 grams)

1 tablespoon sugar

1/4 teaspoon dried thyme (I’d double that next time or use 1 tablespoon fresh thyme)

1/2 teaspoon salt

pinch freshly ground nutmeg

Beat the  butter and lemon zest with an electric mixer at medium speed until smooth, about 30 seconds.  Slowly beat in the egg yolk and cream.

Whisk the flour, cheeses, sugar, salt, thyme and nutmeg together in a bowl.  Gradually add the flour mixture into the butter mixture while mixing slowly.  Scrape down the sides of the bowl, then beat on medium speed until combined and dough is sticky.  Wrap the dough in plastic and chill for at least 30 minutes.

Roll the dough onto a wax or parchment paper lined baking sheet dusted with a little flour to about 1/8-1/4 inch thickness.  Freeze the dough for about 15 minutes.

Preheat oven to 325 degrees.  Line a baking sheet with parchment paper.  Cut the dough into desired shapes.  I just baked the scrap pieces in the shape they were in as well, instead of re-rolling it. 

Bake for 20-25 minutes until golden.  Let sit on baking sheet for a few minutes.  Transfer to wire rack to cool completely.  Store in airtight container for up to 1 month.

DSCF4480  

Look it’s the Eiffel Tower!  Or a teepee.  Or, okay, it’s just a scrap.  Look it’s my goofy boys!

39196_147468401933825_100000119994834_465084_2775517_n (1)

Couldn’t leave Kevin out of the pictures.  He’ll be so happy that I put these pictures on the blog, he says I only ever put goofy pictures of him on here.  (You ever played Hawaiian Charades?  You must.)

IMG_2091 IMG_2090

Love you, Hon!